Ultimate PC Hardware Guide for Windows 10 & 11 (2026)
Complete guide to PC hardware checking and optimization for Windows 10 & 11, from specs to monitoring.

Your PC hardware determines everything about your Windows experience - from boot speeds to gaming performance. Understanding what you have is the first step to optimization.
This guide covers everything you need to know about PC hardware in Windows - from checking specs to monitoring temperatures and understanding component differences.
Checking Your PC Specifications
Before any upgrade or troubleshooting, you need to know exactly what hardware you’re working with.
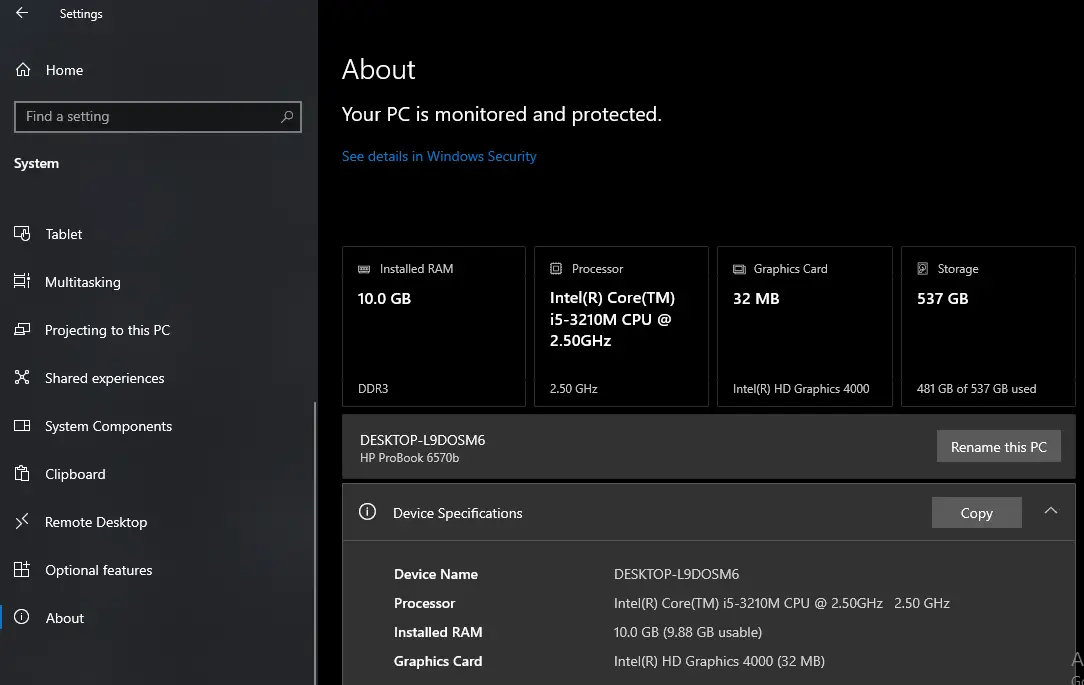
How to Check PC Specs in Windows
Windows has built-in tools to show your complete system information:
- System Information app
- Task Manager Performance tab
- DirectX Diagnostic Tool
- Device Manager
Step-by-step instructions: How to Check Your PC Specs in Windows
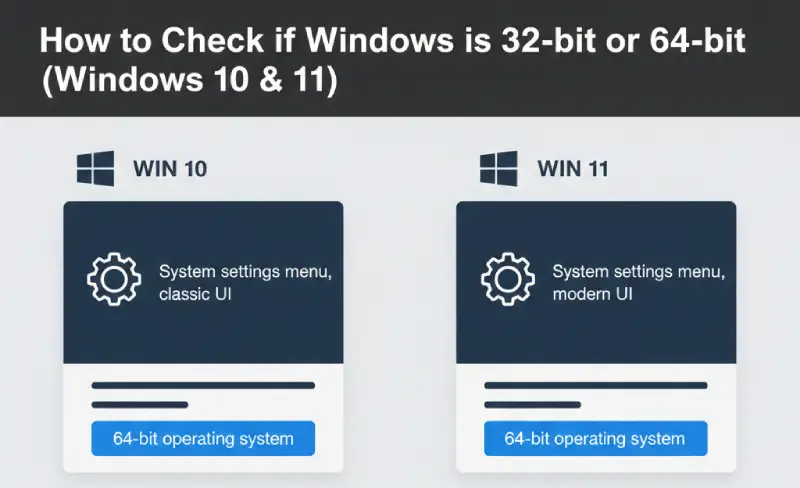
Check 32-bit or 64-bit Architecture
This affects software compatibility and RAM limitations. Most modern systems are 64-bit, but it’s worth confirming.
Quick verification: Check 32-bit or 64-bit Windows 10 & 11
CPU and Temperature Management
Your CPU is the brain of your computer, and temperature management is crucial for performance and longevity.
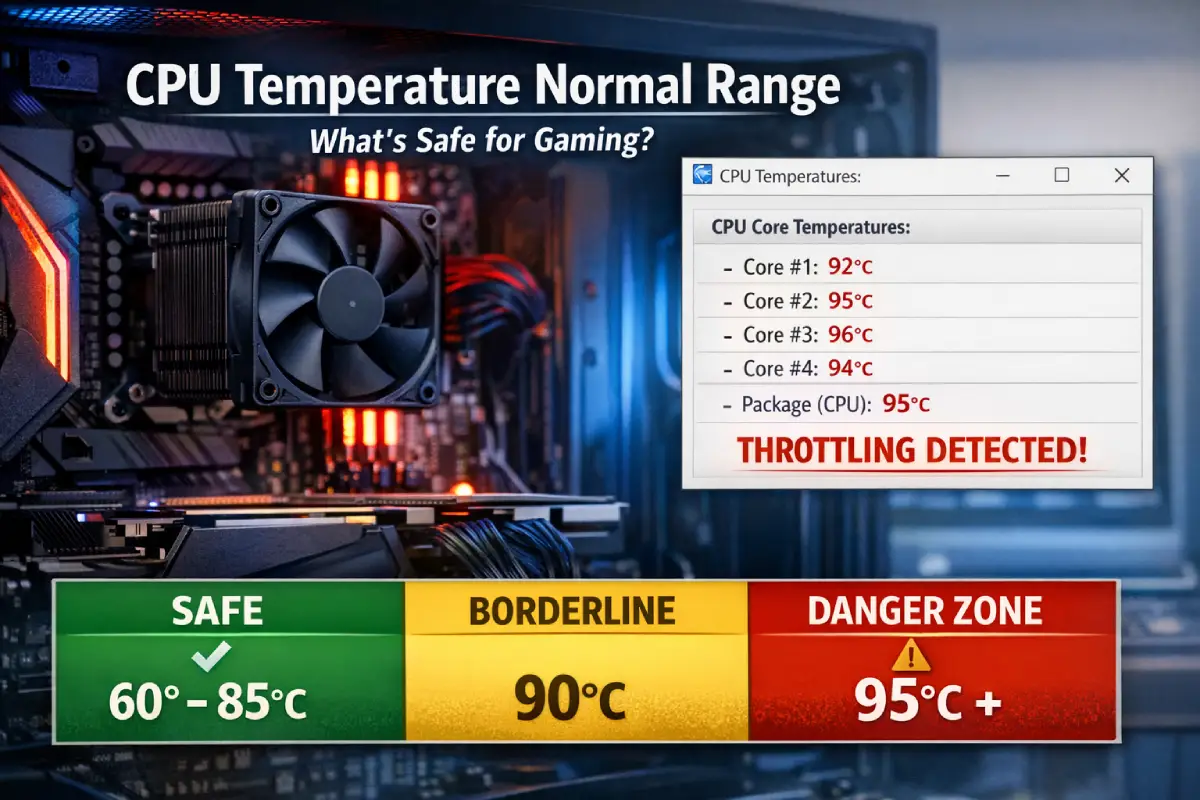
Normal CPU Temperature Range
Understanding what’s normal helps you identify problems:
- Idle: 30-50°C
- Load: 60-85°C
- Gaming: 70-90°C
- Danger: Above 95°C
Learn safe ranges and monitoring: CPU Temperature Normal Range for Gaming
Thermal Throttling
When CPU gets too hot, it automatically slows down to protect itself. This is thermal throttling.
Understanding this helps maintain performance: What is Thermal Throttling
Graphics and Display
Your graphics solution determines gaming and visual performance.
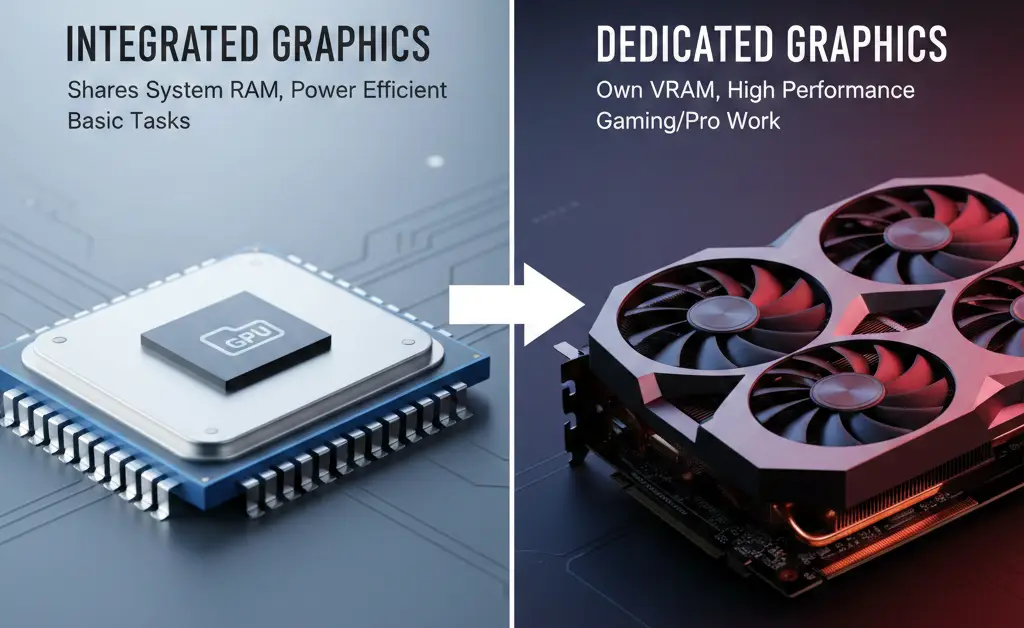
Integrated vs Dedicated Graphics
The choice between integrated and dedicated graphics affects gaming, video editing, and overall system performance.
Integrated: Built into CPU, power-efficient Dedicated: Separate card, powerful for demanding tasks
Detailed comparison: Integrated vs Dedicated Graphics Difference
Motherboard and Memory Support
Your motherboard determines what hardware you can install and how it performs.
Maximum RAM Support
Motherboards have limits on:
- Maximum RAM capacity
- RAM type compatibility (DDR3/DDR4/DDR5)
- Number of memory slots
Check your limits: How to Check Maximum RAM Supported by Your Motherboard
Choosing the Right Power Supply
A good power supply (PSU) keeps your PC stable and protects components from crashes, shutdowns, and power issues. Before upgrading a GPU or building a gaming PC, you should check PSU wattage, efficiency rating, and connector compatibility.
Things to consider:
- Total system wattage
- GPU and CPU power requirements
- 80 Plus Bronze, Gold, or Platinum ratings
- PCIe power connectors
- Future upgrade support
Complete guide: How to Choose the Right Power Supply for Your PC Build
Hardware Monitoring Tools
Keep track of your hardware performance to catch issues early.
Recommended Tools
- HWMonitor: Temperature and voltage monitoring
- CrystalDiskInfo: Storage health monitoring
- GPU-Z: Graphics card information
- CPU-Z: Processor details
When to Upgrade Hardware
Consider upgrading if:
- Your system doesn’t meet minimum requirements for software
- Gaming performance is poor despite optimization
- CPU temperatures are consistently high
- You’re using integrated graphics for demanding tasks
Hardware Upgrade Process
- Check compatibility: Motherboard, power supply, physical space
- Backup data: Before any hardware changes
- Update drivers: After installation
- Test stability: Stress test new components
- Monitor temperatures: Ensure proper cooling
Common Hardware Issues
High CPU Temperatures
If your CPU is running hot:
- Check cooling system
- Clean dust from fans and heatsinks
- Ensure proper airflow
- Reapply thermal paste
Slow Performance Despite Good Specs
Usually software-related:
- Update drivers
- Check for malware
- Optimize startup programs
- Monitor resource usage
Bottom Line
Good hardware performance comes from:
- Understanding your specs: Know what you have
- Proper monitoring: Catch issues early
- Regular maintenance: Keep components healthy
- Smart upgrades: Target actual bottlenecks
Your Windows experience depends on hardware, but hardware depends on proper management and optimization.
For more Windows optimization guides, check out our Windows Performance pillar page.
CPU Temperature Normal Range, What’s Safe for Gaming?
Worried your CPU temperature is too high while gaming? Here’s the normal range, what’s actually safe, and how to quickly fix overheating on Windows 10 and 11.
Integrated vs. Dedicated Graphics: What's the Difference?
Understand the key differences between integrated and dedicated graphics, their pros and cons, and which type is best suited for your computing needs.
How to Check if Windows is 32-bit or 64-bit (Windows 10 & 11)
Learn how to quickly determine if your Windows 10 or Windows 11 operating system is 32-bit or 64-bit using simple built-in methods.
How to Check Your PC Specs in Windows (Step-by-Step Guide)
Learn multiple ways to quickly check your PC's specifications in Windows 10 and 11, including CPU, RAM, and operating system details.