Changing a file extension in Windows 10 is simple once you enable file name extensions. In this step-by-step guide, you will learn how to show file extensions and safely rename them.
Why Change File Extensions?
You may need to change a file extension when:
- Converting
.txtto.htmlfor web development - Creating script files like
.bat - Fixing incorrect file types
- Testing how different file formats behave
By default, Windows 10 hides file extensions, which makes file management harder.
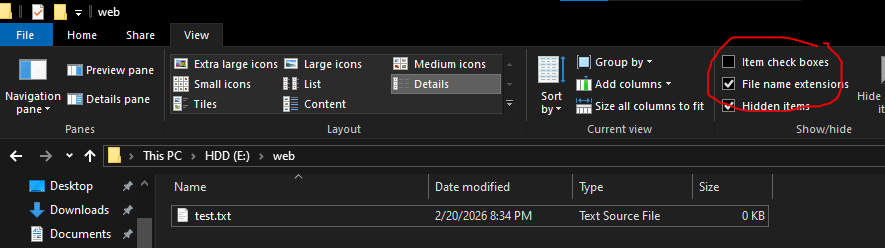
Step 1: Enable File Name Extensions in Windows 10
Before changing a file extension, you must make them visible.
- Open File Explorer (Press
Windows + E) - Click the View tab at the top
- Check the box File name extensions
After enabling this option, you will see extensions like .txt, .html, .jpg, etc.
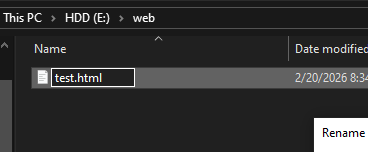
Step 2: Rename the File Extension
Now that extensions are visible:
- Right-click the file
- Click Rename
- Change the extension
Example:test.txt → test.html
- Press Enter
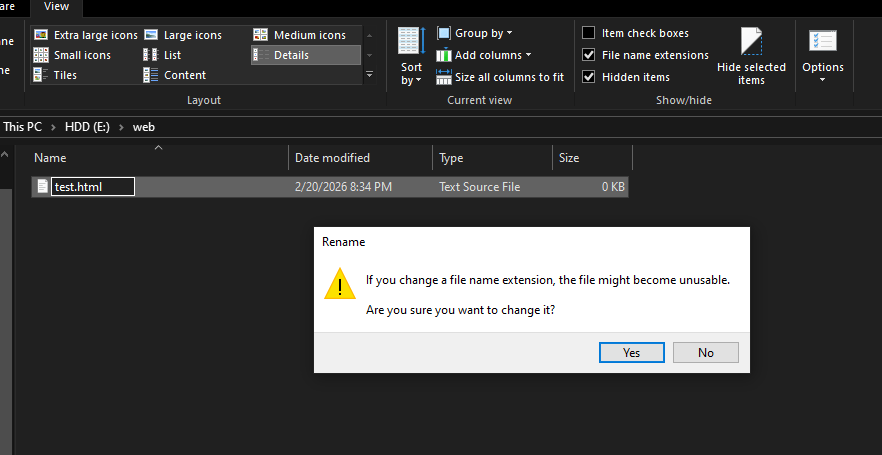
Step 3: Confirm the Warning Message
When you change the extension, Windows will show a warning message:
If you change a file name extension, the file might become unusable.
Click Yes if you are sure.
Important: Changing Extension vs Converting File
Changing the file extension does not convert the file format.
For example:
- Renaming
.mp4to.mp3does not convert video into audio. - Renaming
.txtto.pdfdoes not create a real PDF file.
If you need to convert files, use proper file conversion software.
Conclusion
Now you know how to change file extension in Windows 10 step-by-step. By enabling file name extensions and renaming files correctly, you can manage your files more efficiently.
This small setting makes a big difference, especially for beginners, students, and developers.